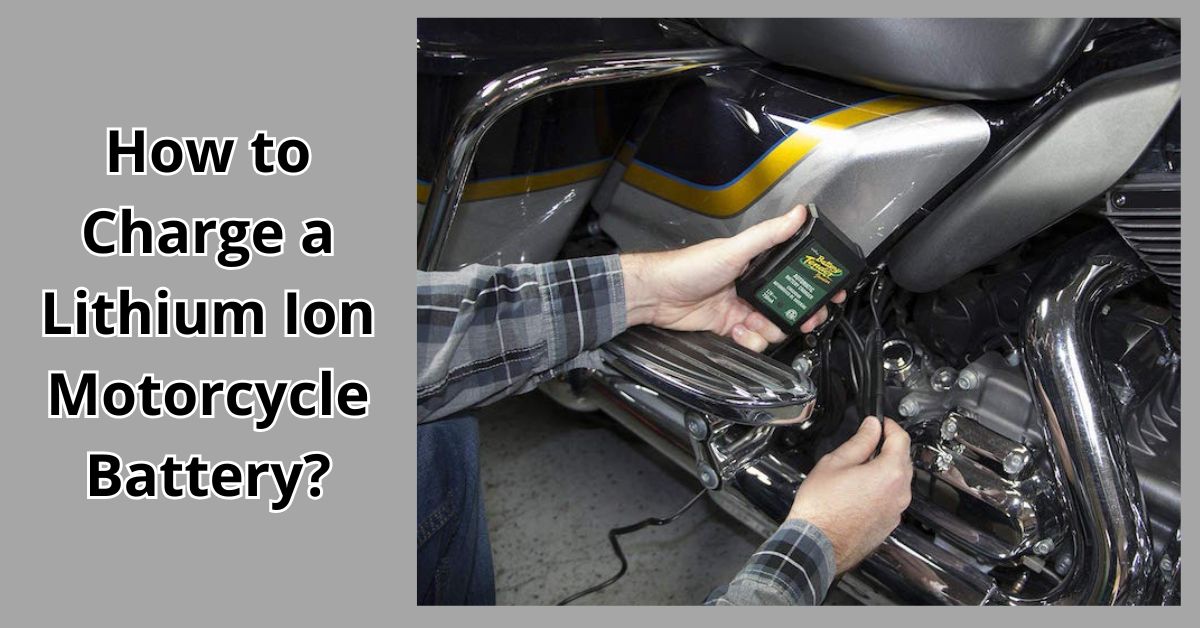
How to Charge a Lithium Ion Motorcycle Battery: Expert Tips
Charging a lithium-ion motorcycle battery is straightforward. It’s important to follow the right steps to keep it healthy.
A lithium-ion battery is a popular choice for motorcycles due to its efficiency and long life. Many riders prefer these batteries because they are lightweight and reliable. But, to get the most out of them, you need to know how to charge them properly.
Incorrect charging can shorten the battery’s lifespan or even damage it. In this guide, we’ll walk you through the steps to charge your lithium-ion motorcycle battery safely and effectively. This will ensure you get the best performance and longevity from your battery. Let’s dive into the details and keep your ride ready to go!

Credit: www.revzilla.com
Preparing For Charging
Before charging your lithium ion motorcycle battery, proper preparation is crucial. Ensuring you have the right tools and follow safety guidelines will make the process smooth and safe.
Gather Necessary Tools
To charge a lithium ion motorcycle battery, you need specific tools. Here is a list of essential items:
- Lithium ion battery charger: Ensure it is compatible with your battery.
- Safety gloves: Protect your hands from any chemical exposure.
- Safety goggles: Shield your eyes from any potential splashes.
- Cleaning cloth: Use to clean battery terminals if needed.
- Multimeter: Check the battery’s voltage before and after charging.
Safety Precautions
Safety is paramount when dealing with batteries. Follow these precautions:
- Work in a well-ventilated area: Avoid charging in confined spaces.
- Wear protective gear: Use gloves and goggles at all times.
- Check for damage: Inspect the battery for any visible damage before charging.
- Avoid sparks: Keep the charger away from flammable materials.
- Follow instructions: Read the charger manual and follow all guidelines.
By gathering the necessary tools and following safety precautions, you set the stage for a successful charging process.
Removing The Battery
Removing the battery is a crucial step when charging your lithium ion motorcycle battery. Ensuring you follow the correct steps will help you avoid damage. It also ensures your safety during the process.
Locate The Battery
First, you need to find the battery on your motorcycle. Most motorcycle batteries are located under the seat. Some may be found under a side cover. Check your motorcycle’s manual for the exact location. It is important to know where the battery is before you start.
Disconnect Safely
Once you have located the battery, it’s time to disconnect it. Start by turning off the ignition. This ensures no power is running through the bike. Next, remove any covers protecting the battery. Use a wrench to loosen the negative terminal first. The negative terminal is usually marked with a minus (-) sign. After that, disconnect the positive terminal. The positive terminal is marked with a plus (+) sign. Make sure to keep the cables from touching each other.
Now, your battery is ready to be removed from the motorcycle. Carefully lift the battery out of its compartment. Place it on a flat, stable surface. This will make it easier to charge the battery safely.
Choosing The Right Charger
Choosing the right charger for your lithium-ion motorcycle battery is crucial. Using the wrong charger can damage your battery or shorten its lifespan. This section will guide you through the process.
Compatible Chargers
Always use a charger compatible with lithium-ion batteries. Check the charger’s specifications to ensure it matches your battery’s voltage and capacity. A charger with the wrong voltage can be harmful.
Consult your motorcycle’s manual or the battery’s documentation. These resources will provide the correct specifications. Using a charger designed for other battery types, like lead-acid, can cause overcharging or undercharging.
| Battery Type | Recommended Charger |
|---|---|
| Lithium-Ion | Lithium-Ion Specific Charger |
| Lead-Acid | Lead-Acid Charger |
Avoiding Overcharging
Overcharging can damage your lithium-ion battery. Most modern chargers have built-in safety features. These features prevent overcharging.
Look for chargers with automatic shut-off or trickle charge functions. These features stop charging once the battery is full. They help maintain your battery’s health.
Set a timer if your charger lacks these features. Unplug the charger once the battery is fully charged. Regularly check your battery during charging.
- Use a charger with automatic shut-off
- Set a timer for manual chargers
- Regularly monitor the battery’s charge level
Charging Process
Charging a lithium-ion motorcycle battery properly is essential. It ensures the battery’s longevity and performance. Follow these steps to safely and effectively charge your battery.
Connecting The Charger
To start, make sure you have a compatible charger for your lithium-ion battery. Using the wrong charger can damage the battery.
Follow these steps to connect the charger:
- Turn off the motorcycle and remove the battery if needed.
- Locate the positive and negative terminals on the battery.
- Connect the red lead to the positive terminal.
- Connect the black lead to the negative terminal.
- Plug the charger into a power source.
Ensure the connections are secure. Loose connections can lead to improper charging.
Monitoring The Charge
Once the charger is connected, start monitoring the charge. Many modern chargers have built-in displays. These show the charging status and battery level.
Key points to monitor:
- Charging time: Lithium-ion batteries usually take a few hours to charge.
- Temperature: The battery should remain cool. Overheating indicates a problem.
- Voltage: Check the voltage periodically to avoid overcharging.
Some chargers automatically shut off when the battery is fully charged. If not, disconnect the charger once the battery is fully charged. This prevents overcharging and potential damage.
By following these steps, you ensure your lithium-ion motorcycle battery is charged safely and efficiently.
Reinstalling The Battery
Reinstalling the battery in your motorcycle is a crucial step. It ensures the bike runs smoothly. Follow these steps to avoid common mistakes and ensure safety.
Reconnect Properly
First, reconnect the positive terminal. Use a wrench to tighten the bolt. Then, reconnect the negative terminal. Again, use a wrench for a secure connection. Ensure all connections are tight. Loose connections can cause issues.
Secure The Battery
Next, place the battery in its compartment. Make sure it sits properly. Use the battery strap or bracket. This prevents movement while riding. Check the battery is secure by gently shaking it. It should not move or rattle.
Post-charging Checks
After successfully charging your lithium-ion motorcycle battery, conducting post-charging checks is crucial. These checks ensure the battery is in top condition and ready for use. Proper inspection can help prevent potential issues and extend battery life.
Inspecting Connections
Begin by inspecting the battery connections. Ensure all terminals are secure and free from corrosion. Loose connections can lead to poor battery performance. Clean any dirt or corrosion with a wire brush. Tighten any loose connections using a wrench or pliers. Proper connections ensure efficient power flow.
Testing Battery Health
Next, test the battery’s health using a voltmeter. Turn the voltmeter to the DC setting. Connect the red probe to the positive terminal. Connect the black probe to the negative terminal. A fully charged lithium-ion battery should read around 12.6 to 13.2 volts. If the voltage is lower, consider recharging the battery or checking for any underlying issues.
For a more in-depth check, use a battery tester. This device can provide information on the battery’s capacity and overall condition. Follow the manufacturer’s instructions for accurate results. Regular testing ensures your battery remains reliable and efficient.
Maintaining Battery Health
Proper maintenance is essential for a lithium ion motorcycle battery. It ensures a long life and consistent performance. Regular care keeps your battery at its best. Let’s explore some tips on maintaining battery health.
Regular Charging Tips
Regular charging is key to battery health. Follow these tips:
- Charge the battery after every use.
- Use a charger designed for lithium ion batteries.
- Avoid overcharging. Disconnect when fully charged.
Storage Recommendations
Proper storage is crucial for your battery’s longevity. Follow these guidelines:
- Store in a cool, dry place.
- Keep the battery at 50% charge if stored long-term.
- Avoid extreme temperatures.
Troubleshooting Common Issues
Charging a lithium-ion motorcycle battery can sometimes present challenges. You might face various issues that prevent the battery from charging properly. Identifying these problems and understanding their solutions is key to maintaining your battery’s health.
Identifying Problems
First, check if the battery is not charging at all. This could indicate a problem with the charger. Inspect the charger for any visible damage. Also, ensure it is plugged into a working power source.
Next, observe the battery for any swelling or leaks. These are signs of battery damage. If the battery is hot to touch, it might be overheating. This can be due to overcharging or a faulty charger.
Listen for any unusual noises coming from the battery while charging. Clicking or hissing sounds can indicate internal issues. Also, check for any error codes displayed on the charger. These codes can help identify specific problems.
Solutions And Repairs
If the charger appears damaged, replace it with a new one. Make sure to use a charger compatible with your lithium-ion battery. For a swollen or leaking battery, it’s best to replace it immediately. Do not attempt to use or charge a damaged battery.
To resolve overheating, allow the battery to cool down before charging again. Check if the charger is working properly. If the issue persists, consider using a different charger. For unusual noises, stop charging and inspect the battery. It may need professional repair or replacement.
If error codes appear, refer to the charger’s manual. The manual will provide specific troubleshooting steps for each code. Follow the instructions carefully to resolve the issue.
Credit: www.fastbikegear.co.nz
Frequently Asked Questions
How Do You Charge A Lithium Ion Motorcycle Battery?
Charging a lithium ion motorcycle battery involves using a compatible charger. Connect the charger to the battery terminals, ensuring correct polarity. Set the charger to the appropriate voltage and current settings. Monitor the charging process, and disconnect once fully charged.
Can I Use Any Charger For My Lithium Battery?
No, you must use a charger specifically designed for lithium ion batteries. Using an incompatible charger can damage the battery, reduce its lifespan, or even pose safety risks. Always check the manufacturer’s recommendations.
How Long Does It Take To Charge?
Charging time varies based on the battery’s capacity and charger specifications. Typically, it can take 1 to 3 hours to fully charge a lithium ion motorcycle battery. Always monitor the charging process to prevent overcharging.
Is It Safe To Leave The Battery On The Charger?
No, it’s not safe to leave the battery on the charger indefinitely. Overcharging can damage the battery and reduce its lifespan. Always follow the manufacturer’s guidelines for charging times and disconnect the charger once the battery is fully charged.
Conclusion
Charging a lithium-ion motorcycle battery is simple. Follow the steps mentioned above. Ensure the charger matches your battery type. Always keep safety in mind. Regular checks prolong battery life. Proper maintenance prevents issues. A well-charged battery means smoother rides. Enjoy the journey with a reliable power source.
Happy riding!