How to Charge a 8 Volt Golf Cart Battery: Step-by-Step Guide
Charging an 8-volt golf cart battery is simple. Proper charging extends the battery’s life.
Golf carts are fun and useful, but they need proper maintenance. One key part is knowing how to charge their batteries correctly. Missteps in charging can lead to short battery life and poor performance. This guide will help you understand the steps to charge an 8-volt golf cart battery safely and effectively.
Whether you are a new golf cart owner or just need a refresher, this information will ensure your cart runs smoothly for years. Let’s dive into the basics and get your golf cart ready for the next round.

Credit: www.golfcartgeeks.com
Gathering Tools And Materials
Before charging your 8-volt golf cart battery, it’s important to gather the right tools and materials. This ensures a smooth and safe process. Here, we will list the required tools and essential safety gear to help you get started.
Required Tools
- Battery Charger: Ensure it’s compatible with an 8-volt battery.
- Multimeter: To check the battery’s voltage.
- Battery Terminal Cleaner: To remove any corrosion.
- Wrench Set: For loosening and tightening battery terminals.
- Distilled Water: For topping up the battery cells, if needed.
Essential Safety Gear
- Safety Glasses: Protects your eyes from sparks or splashes.
- Gloves: Use rubber gloves to prevent electric shocks.
- Protective Clothing: Wear long sleeves and pants to protect your skin.
- Face Mask: To avoid inhaling harmful fumes.
Preparing The Battery
Preparing the battery is an essential first step to ensure your golf cart runs smoothly. Proper preparation can extend the life of the battery and improve performance. Here, we will focus on inspecting the battery and cleaning the terminals before charging.
Inspecting The Battery
Begin by inspecting the battery for any visible damage. Look for cracks, leaks, or bulges. These signs indicate the battery might need replacing. Check the battery case for any signs of corrosion or wear.
Next, ensure all connections are secure. Loose connections can lead to poor performance or even damage. If you find any loose terminals, tighten them carefully. Always wear gloves and safety glasses to protect yourself from any acid that may be present.
Cleaning The Terminals
Cleaning the terminals is vital for a good electrical connection. Follow these steps for effective cleaning:
- First, disconnect the battery. Always remove the negative terminal first to prevent short circuits.
- Use a wire brush or terminal cleaner to remove any corrosion. Corrosion can cause poor connections and reduce battery efficiency.
- Mix a tablespoon of baking soda with a cup of water. Use this solution to clean the terminals. The baking soda neutralizes the acid and helps remove dirt.
- Dry the terminals with a clean cloth. Ensure no moisture is left to avoid future corrosion.
- Reconnect the terminals, connecting the positive terminal first.
By following these steps, you can ensure your battery is ready for charging. Clean terminals and a well-inspected battery will provide better performance and longer life.
Setting Up The Charger
Setting up the charger for your 8-volt golf cart battery is vital. A correct setup ensures the battery charges safely and efficiently. Follow these steps to get it right.
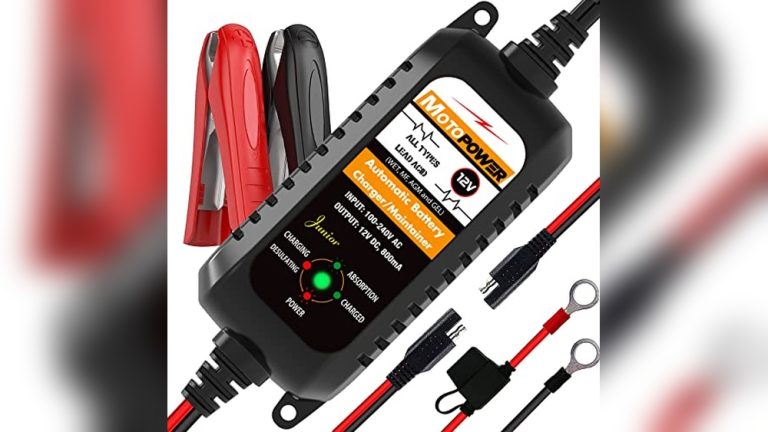
Choosing The Right Charger
Select a charger designed for 8-volt batteries. Ensure it matches the battery’s voltage and capacity. Using the wrong charger can damage the battery.
Read the charger’s manual. Confirm it supports 8-volt batteries. Also, check for safety features like overcharge protection.
Connecting The Charger
Before connecting, turn off the charger. This prevents sparks and ensures safety. Locate the battery terminals. These are usually marked with a plus (+) and minus (-) sign.
Connect the charger’s red clamp to the positive terminal. Next, attach the black clamp to the negative terminal. Make sure the connections are secure.
Once connected, plug the charger into an outlet. Turn it on and monitor the charging process. Check the battery regularly to avoid overcharging.
Credit: www.youtube.com
Charging The Battery
Charging an 8-volt golf cart battery is essential for keeping your cart running smoothly. Regular charging ensures the battery stays healthy and your cart performs well. Here’s a step-by-step guide to help you charge your battery safely and efficiently.
Starting The Charge
Before you start charging, ensure all safety measures are in place. Wear safety gloves and goggles to protect yourself. Follow these steps to begin:
- Turn off the golf cart and remove the key.
- Locate the battery compartment and open it.
- Check the battery terminals for any dirt or corrosion. Clean if necessary.
- Connect the charger cables to the battery terminals. Ensure the positive cable (red) goes to the positive terminal and the negative cable (black) goes to the negative terminal.
- Plug the charger into a power outlet and turn it on.
Monitoring The Process
Once the charging process has started, it is important to monitor the progress. This ensures the battery charges correctly and prevents any issues.
- Check the charger indicator to see the charging status.
- Avoid overcharging by setting a timer. Most chargers have an automatic shut-off feature, but it’s good to keep an eye on it.
- Inspect the battery temperature occasionally. If the battery gets too hot, stop the charging immediately.
Using a table can help you keep track of essential information during the charging process:
| Step | Action | Notes |
|---|---|---|
| 1 | Turn off the golf cart | Remove the key |
| 2 | Open battery compartment | Ensure safety gear is on |
| 3 | Check terminals | Clean if dirty |
| 4 | Connect charger cables | Red to positive, black to negative |
| 5 | Plug in charger | Turn on the charger |
Following these steps ensures your golf cart battery charges safely and efficiently. Regular monitoring of the process helps prevent any charging issues.
Completing The Charge
Charging your 8-volt golf cart battery correctly ensures its long life. Completing the charge is a critical step. This final stage requires attention and care.
Determining Full Charge
Knowing when your battery is fully charged is essential. Most chargers have an indicator light. When the light turns green, the battery is fully charged. Some chargers may beep. Refer to your charger’s manual for details.
Another method is using a voltmeter. A fully charged 8-volt battery should read around 8.49 volts. Connect the voltmeter to the battery terminals. Read the display to confirm the charge level.
Disconnecting The Charger
Once the battery is fully charged, disconnect the charger. Turn off the charger first. Then, unplug it from the power source. Finally, remove the charger’s clamps from the battery terminals.
Ensure you follow the correct order to avoid sparks. Always handle the charger and battery with care.
| Step | Action |
|---|---|
| 1 | Turn off the charger |
| 2 | Unplug the charger from the power source |
| 3 | Remove the charger’s clamps from the battery |
Completing the charge ensures your golf cart battery is ready for use. Follow these steps to maintain battery health and performance.

Credit: www.amazon.com
Post-charging Steps
After successfully charging your 8-volt golf cart battery, taking proper post-charging steps ensures its longevity and optimal performance. This section will guide you through inspecting the battery post-charge and storing the battery safely.
Inspecting The Battery Post-charge
Once the charging process is complete, it’s important to inspect the battery. Follow these steps for a thorough inspection:
- Check the terminals: Ensure the terminals are clean and free from corrosion. Use a wire brush if needed.
- Look for damage: Inspect the battery case for any cracks or leaks. A damaged battery can be dangerous.
- Measure the voltage: Use a voltmeter to confirm the battery has reached its full charge. It should read around 8 volts.
- Inspect fluid levels: For lead-acid batteries, check the electrolyte levels. Refill with distilled water if necessary.
Storing The Battery
Proper storage of your golf cart battery extends its lifespan. Follow these tips for safe storage:
- Clean the battery: Wipe the battery with a damp cloth to remove dirt and grime.
- Store in a cool, dry place: Keep the battery away from direct sunlight and moisture. An ideal storage temperature is between 50-70°F (10-21°C).
- Disconnect the battery: If the golf cart will not be used for a while, disconnect the battery cables to prevent discharge.
- Charge periodically: Even in storage, charge the battery every 30-60 days to maintain its health.
| Action | Frequency |
|---|---|
| Inspect terminals | After each charge |
| Check voltage | After each charge |
| Refill electrolyte | As needed |
| Charge in storage | Every 30-60 days |
Following these post-charging steps ensures your 8-volt golf cart battery remains in top condition, providing reliable power for your golf cart. Proper inspection and storage are key to extending the battery’s life and maintaining its performance.
Maintenance Tips
Proper maintenance is crucial for the longevity of your 8-volt golf cart battery. Regular care ensures optimal performance and extends the battery’s life. Here are some essential maintenance tips to keep your battery in top shape.
Regular Inspection
Regular inspection of your golf cart battery can prevent many issues. Check the battery terminals for corrosion. Clean them if needed using a mixture of baking soda and water. Ensure all connections are tight. Loose connections can lead to power loss and damage.
Monitor the battery water levels. Use distilled water to top it up if necessary. Never overfill, as this can cause leaks and damage. Inspect the battery case for any cracks or damage. Replace the battery if you notice any severe issues.
Proper Storage
Storing your golf cart battery correctly is vital. If storing for long periods, fully charge the battery first. Store it in a cool, dry place. Avoid areas with extreme temperatures. High temperatures can reduce battery life. Cold environments can cause the battery to freeze.
Disconnect the battery from the golf cart during storage. Use a battery maintainer to keep the battery charged. This prevents it from discharging completely. Regularly check the battery while in storage. Charge it as needed to maintain optimal performance.
Troubleshooting Common Issues
Charging an 8-volt golf cart battery can sometimes be tricky. Common issues can arise. Understanding and troubleshooting these problems is key. Let’s explore some common issues and how to solve them.
Battery Not Charging
A common issue is the battery not charging. Check the connections first. Loose or corroded connections can prevent charging. Clean the terminals with a wire brush. Tighten any loose connections.
Next, check the charger. Ensure it’s properly connected and functioning. Use a multimeter to test the voltage. If the charger is faulty, replace it. Inspect the battery for damage. Cracks or leaks mean it needs replacement.
Overheating Issues
Overheating is another common problem. It can damage the battery. Check the charger settings. Ensure it’s not overcharging the battery. Overcharging causes excessive heat.
Inspect the battery for signs of overheating. Swelling or a hot surface indicates overheating. Allow the battery to cool down before charging again. Use a charger with an automatic shut-off feature. This prevents overcharging.
Ensure proper ventilation during charging. Keep the battery in a cool, dry place. Avoid charging in direct sunlight or hot environments.
Frequently Asked Questions
How Do You Charge An 8 Volt Golf Cart Battery?
To charge an 8 volt golf cart battery, use a compatible charger. Connect the charger’s positive and negative leads to the battery’s terminals. Ensure the charger is set to 8 volts and follow the manufacturer’s instructions.
Can I Use A 12 Volt Charger On An 8 Volt Battery?
No, using a 12 volt charger on an 8 volt battery can damage the battery. Always use a charger that matches the battery’s voltage.
How Long Does It Take To Charge An 8 Volt Golf Cart Battery?
Charging time varies based on the battery’s capacity and charger. Typically, it takes 6-8 hours for a full charge.
What Is The Best Charger For 8 Volt Golf Cart Batteries?
The best charger is one specifically designed for 8 volt golf cart batteries. Look for a charger with the correct voltage and amperage.
Conclusion
Charging an 8-volt golf cart battery is easy. Follow the steps carefully. Keep your battery clean and connections tight. Use a suitable charger to avoid damage. Check the battery regularly for a longer life. Proper charging ensures your golf cart runs smoothly.
With these tips, you can enjoy a reliable ride. Remember, safety first while handling batteries. Happy golfing!